Octopus Deploy supports SCIM 2 as a feature of the Azure AD authentication provider. This allows users and groups created and managed in Entra ID to be synchronized with users and teams in Octopus Deploy, rather than manually provisioning users or provisioning them just-in-time via Allow Auto User Creation.
This guide has 2 parts, and we recommend confirming each works before moving to the next:
- Configuring Octopus: enable SCIM support and create a service account for Entra ID to use.
- Configuring Entra ID: connect Entra ID to Octopus, map user and group attributes, then turn on provisioning.
Requirements
-
Entra ID authentication configured and working
-
An Octopus Deploy license that includes the SCIM feature, such as an Enterprise license
-
Network access to allow inbound HTTPS API requests from Entra ID to Octopus Deploy.
If you’re using Octopus Cloud, we don’t recommend using IP allow listing with SCIM, as there are a large number of IP addresses used by Entra ID and they can change regularly.
Configuring Octopus
Review existing Octopus users
Review your existing Octopus Deploy users and make sure their email addresses match the details recorded in Entra ID.
Entra ID authentication matches users by email address. If the addresses don’t match, Entra ID creates new users instead of linking to your existing ones.
SCIM makes Entra ID the source of truth for any users and teams it provisions. Octopus Deploy has no way to push changes back to Entra ID, so any edits made to these users or teams in Octopus Deploy get overwritten the next time Entra ID syncs.
Once a user or team is provisioned via SCIM, make any changes to it in Entra ID rather than Octopus Deploy.
Configure user authentication and enable SCIM support
- Configure Entra ID authentication in Octopus Deploy, without external group mappings.
- Confirm you can sign in as an Entra ID user, using the Sign in with Microsoft button on the Octopus Deploy login page.
- Go to Configuration ➜ Settings ➜ Azure AD in Octopus Deploy.
- Uncheck Allow Auto User Creation.
- Check Enable SCIM.
- Select Save.
Entra ID now creates and manages users for you, so neither external group mappings nor auto user creation are needed.
If you can’t see an option for Enable SCIM in the Azure AD settings, check that you’re running a recent version of Octopus Deploy and that you have an Enterprise license.
If you have any questions about licensing, reach out to us at sales@octopus.com.
Configure Machine-to-Machine authentication
Entra ID needs its own Octopus identity to call the SCIM API on your behalf. We recommend a dedicated service account for this.
-
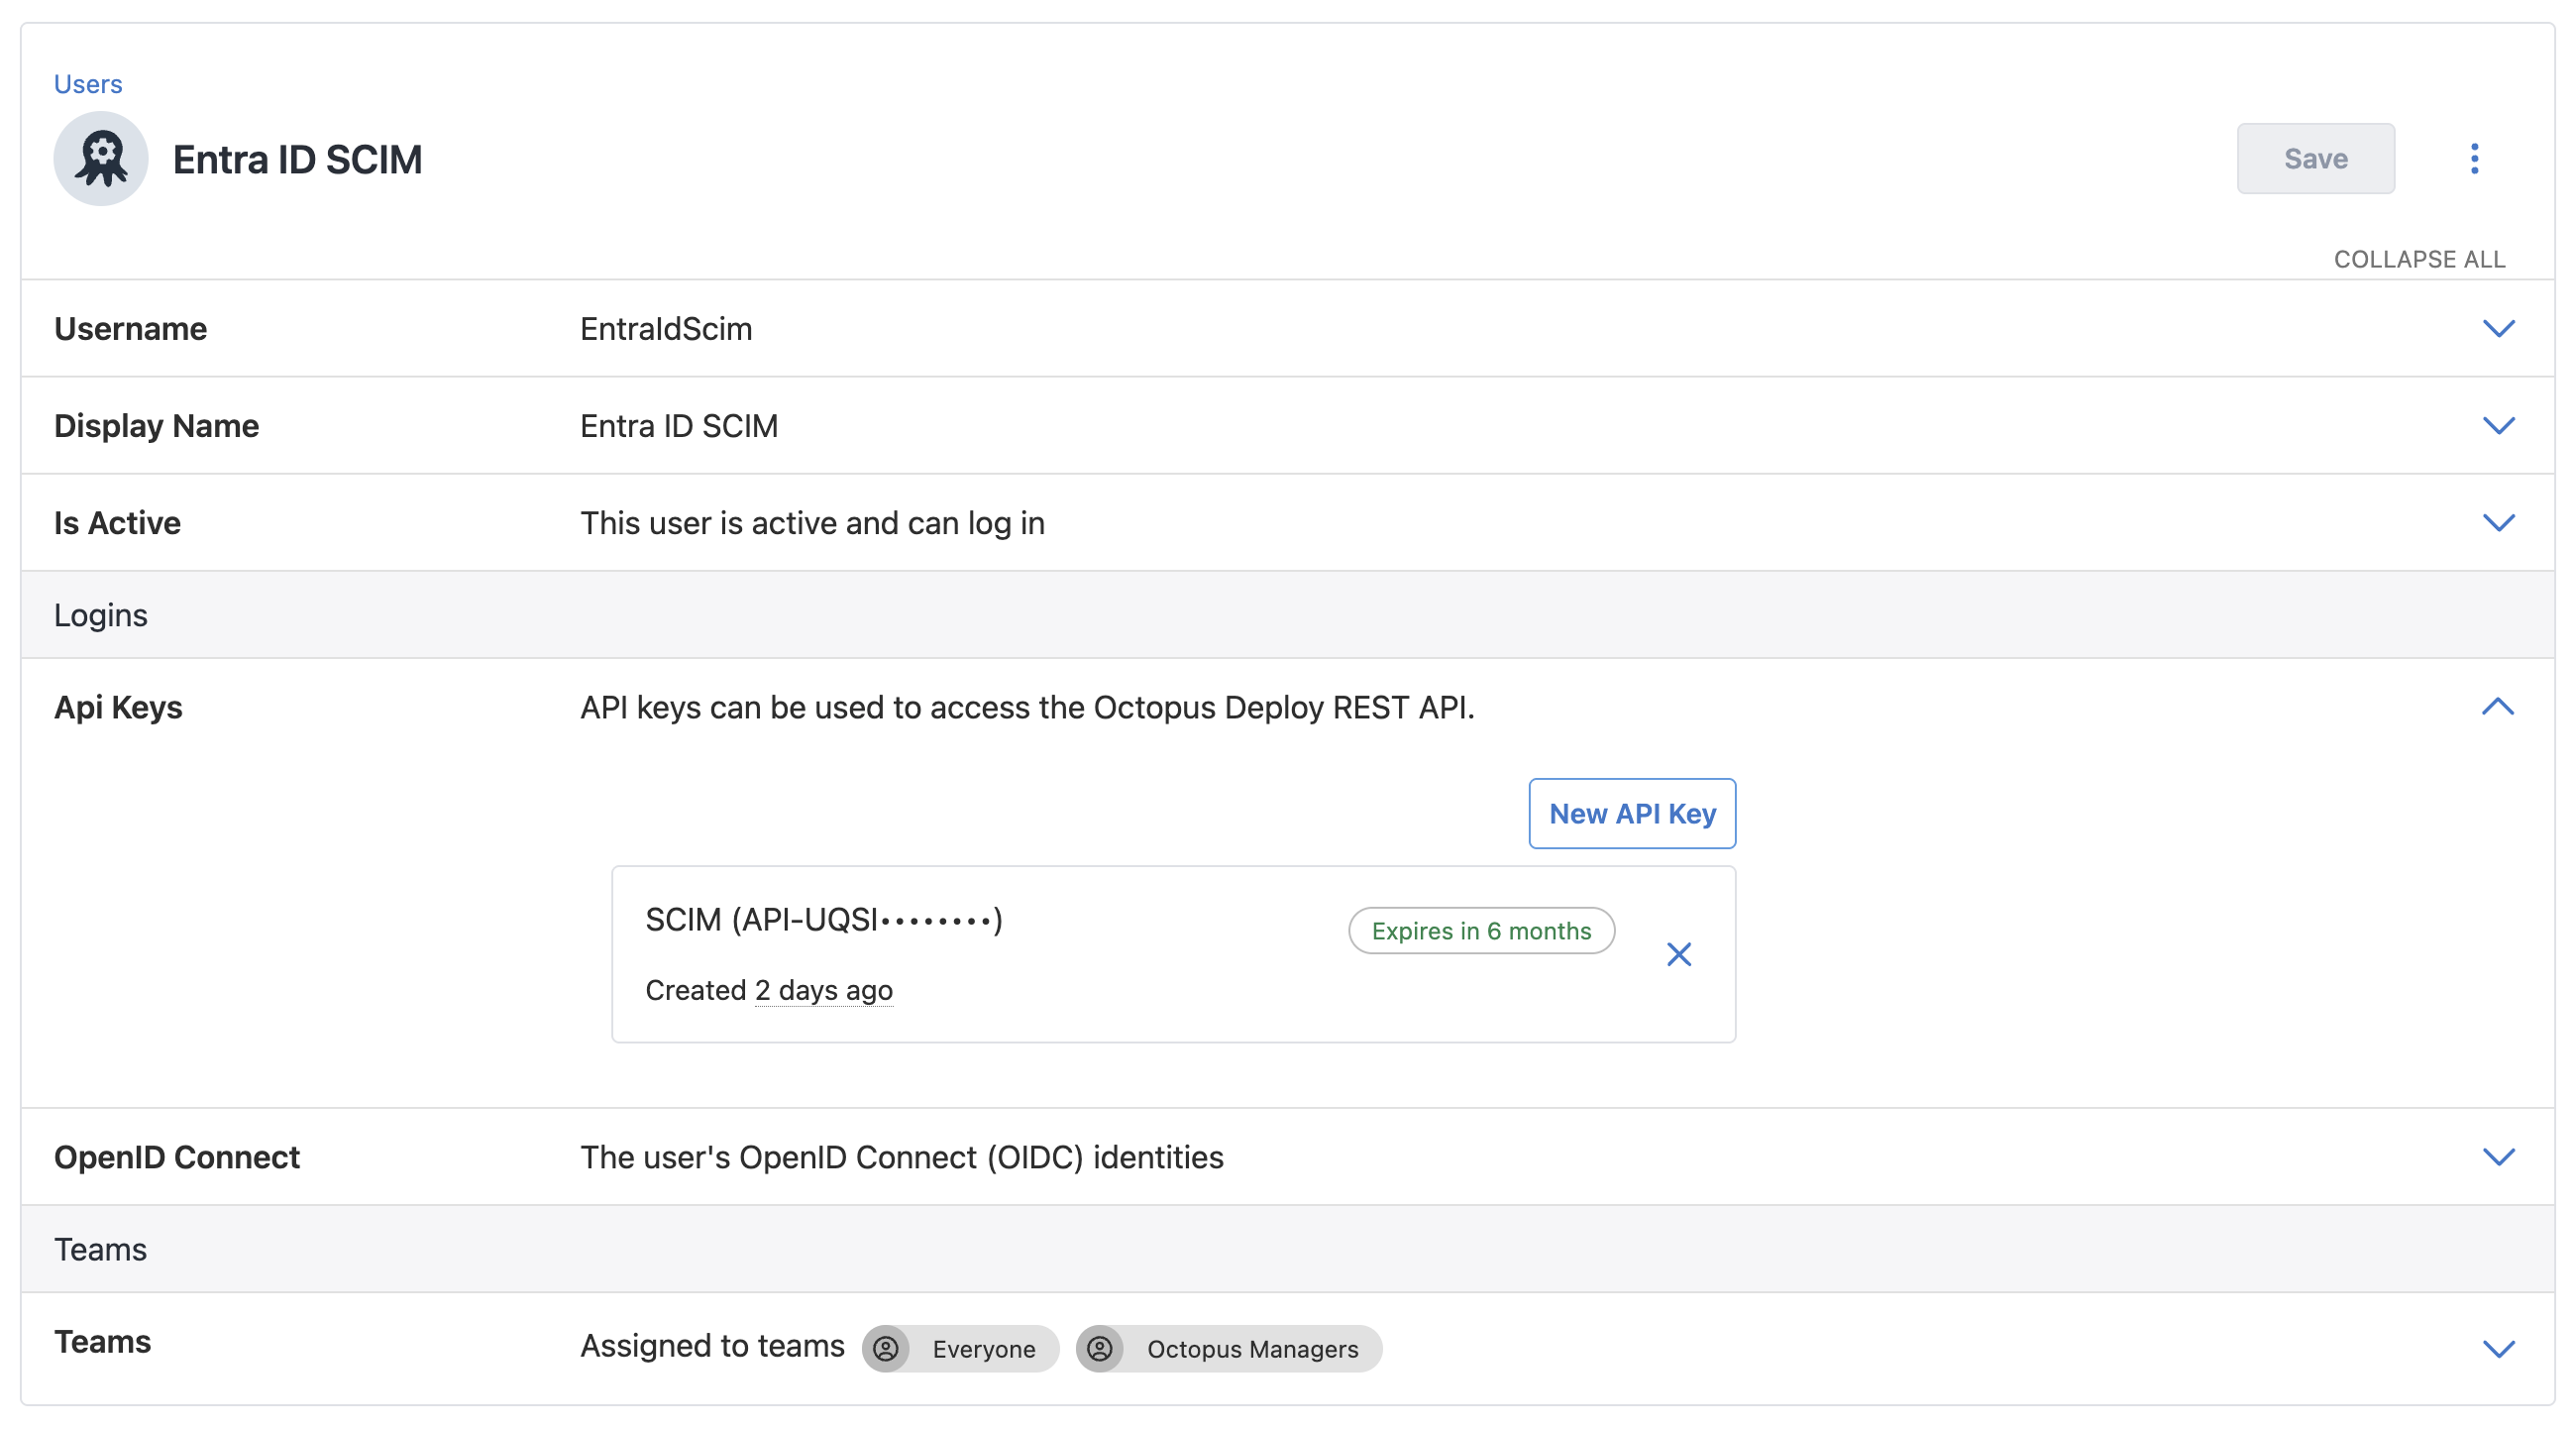
Create a dedicated Service Account for Entra ID SCIM.
-
Add the service account to the Octopus Managers team.
-
Create a new API key for the service account.
The Octopus Deploy account used by Entra ID needs to have Octopus permissions of the same level or greater than the permissions of the users that it is managing. This is required by Octopus Deploy to avoid escalation of privilege, for example to prevent a low-privilege user from creating an administrator account.
Configuring Entra ID
Create new provisioning configuration
-
Open the Azure Portal.
-
Navigate to the Enterprise Application you created for Octopus Deploy when you configured Azure AD authentication for your instance.
If you’re on the App Registration Overview page instead, select Managed application in local directory to get to the matching Enterprise Application.
-
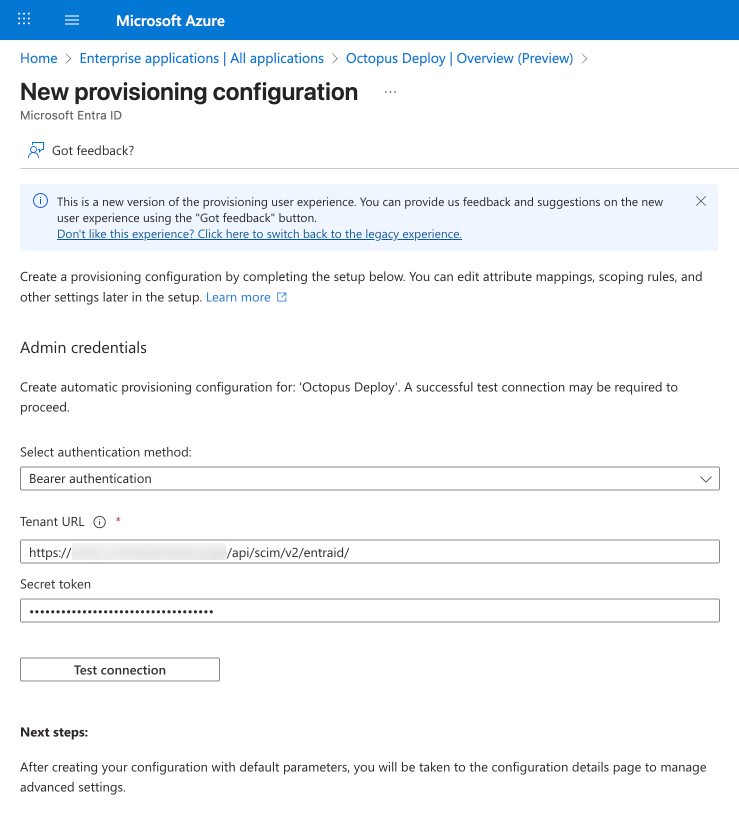
Navigate to the Provisioning section and select New configuration.
- Select authentication method: Bearer authentication
- Tenant URL:
https, replacing: / /<your-octopus-url> /api /scim /v2 /entraid / <your-octopus-url>with your Octopus Server’s URL. - Secret token: the API key you created for the Entra ID SCIM service account
-
Select Test connection.
If the test is not successful, double-check that:
- SCIM is enabled in the Azure AD authentication provider settings, and the changes are saved
- the Tenant URL has the
/apisuffix/scim /v2 /entraid / - the Octopus Deploy instance is reachable from the Entra ID IP addresses
- the service account API key is valid and has sufficient permissions
-
Click Create to save the provisioning configuration.
Map group attributes
-
Within the new provisioning configuration, navigate to Manage ➜ Attribute mapping.
-
Select Provision Microsoft Entra ID Groups.
-
Under Attribute Mappings, delete
externalId, leaving onlydisplayNameandmembers. -
Select Save.

Map user attributes
Provision Microsoft Entra ID Users includes many attributes that Octopus Deploy doesn’t use, such as phone numbers, addresses, and job titles.
-
Within the new provisioning configuration, navigate to Manage ➜ Attribute mapping.
-
Select Provision Microsoft Entra ID Users.
-
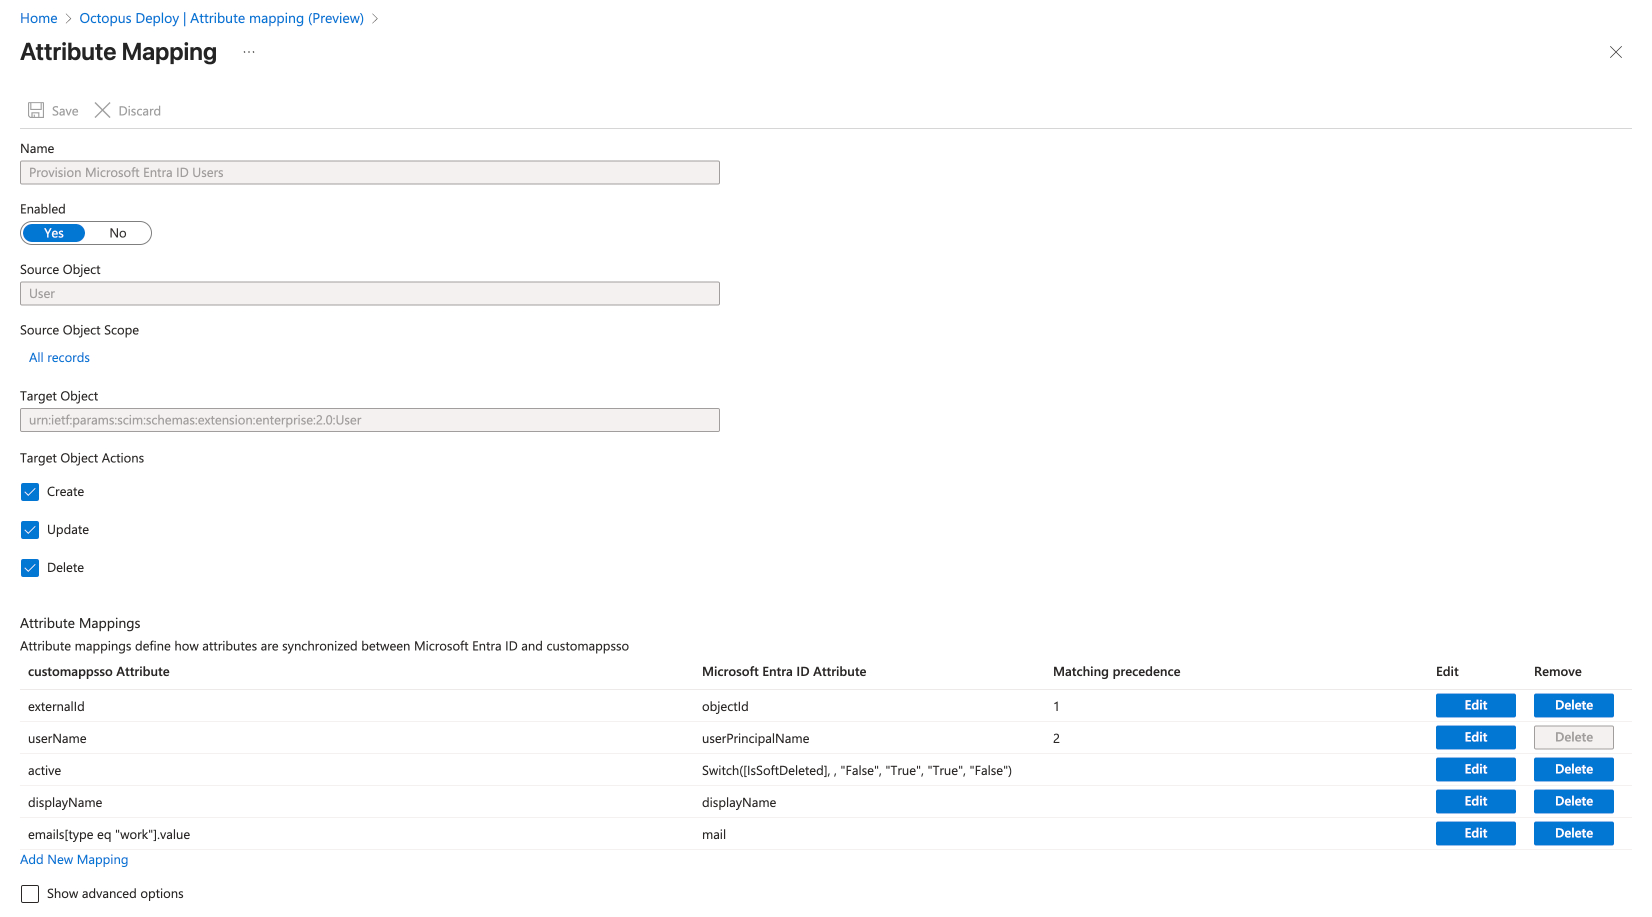
Delete every attribute except:
userNameactivedisplayNameemails[type eq "work"] .value externalId
-
Edit
externalId:- Set the Source attribute to
objectId. - Set Match objects using this attribute to
Yes. - Set Matching precedence to
1.
- Set the Source attribute to
-
Edit
userNameand set Matching precedence to2. -
Confirm the completed user mappings look like this:
Mapping
externalIdtoobjectIdmatches the identifier used by the Azure AD authentication provider, so Octopus Deploy can find the same user via either sign-in or SCIM.The SCIM functionality expects this specific user attribute mapping from Entra ID and may not work correctly if the configured attribute mapping differs.
Review settings and scope
- Navigate back to the provisioning configuration page, then Manage ➜ Provisioning.
- Expand the Settings group and review the options, such as email notifications on failure and the Scope.
- If Scope is set to
Sync only assigned users and groups, navigate to Users and groups and select which users and groups to provision in Octopus Deploy.
Test the configuration
-
Within the new provisioning configuration, navigate to Provision on demand.
-
Select a single Entra ID user to provision in Octopus Deploy.
-
Select Provision.
-
Confirm the results page shows the provisioning was successful.
-
Within Octopus Deploy, navigate to Configuration ➜ Users and confirm the new user appears. If it’s an existing user, their profile now shows an Azure AD login.
If there are any issues with provisioning the single user, review the Entra ID provisioning configuration before proceeding. It’s much easier to fix any issues now, rather than when there are a large number of users and groups that have been incorrectly provisioned.
Start provisioning
-
Navigate to the Overview page of the provisioning configuration.
-
Select Start provisioning.
Start provisioning queues an initial sync job in Entra ID which may take a few minutes to start. The default provisioning interval is 40 minutes, so any changes to users or groups can take up to 40 minutes to be reflected in Octopus Deploy.
-
Wait for the initial sync to complete. The status on the Overview page updates when it’s done.
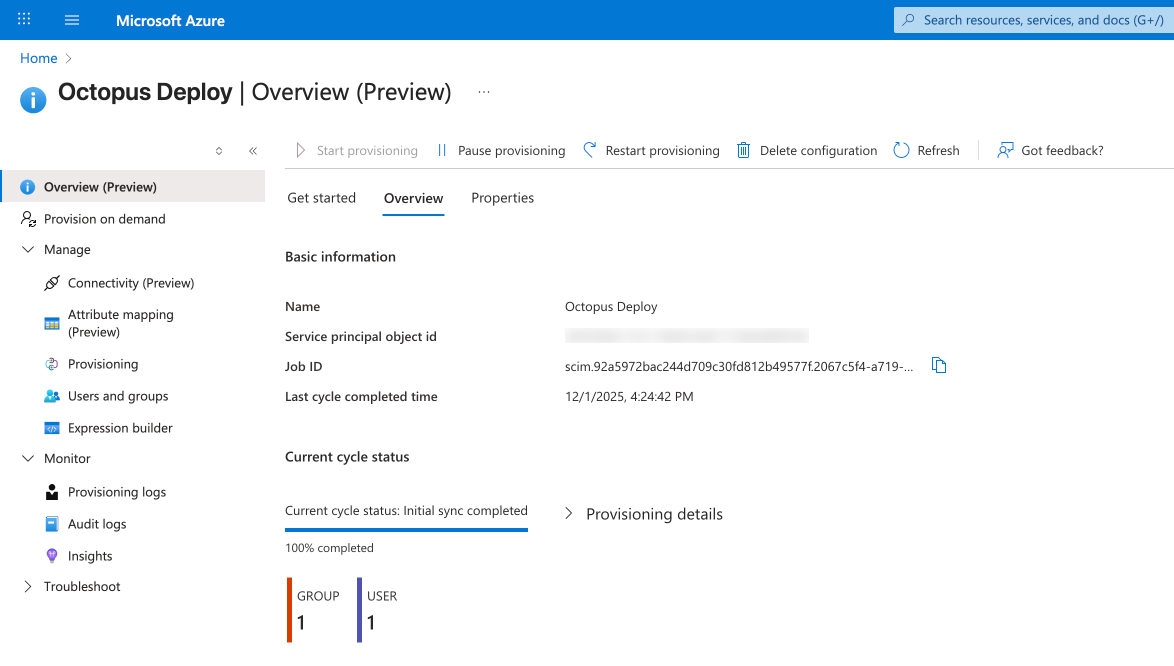
Entra ID will now reach out to Octopus Deploy regularly via the SCIM API whenever a user or group needs to be created, updated or deleted.
From this point on, avoid making changes in Octopus Deploy to any users or teams provisioned via SCIM. Entra ID is the source of truth for them, and any changes made in Octopus Deploy get overwritten the next time Entra ID syncs. Make changes in Entra ID instead.
Troubleshooting
-
Entra ID displays provisioning progress on the Overview page of the provisioning configuration. Provisioning can also be paused and restarted from this page, if you want to encourage Entra ID to try again.
-
Entra ID keeps detailed logs of all provisioning operations, accessible under Monitor ➜ Provisioning logs. Use the Status filter on this page to find any recorded failures. Please download the logs in JSON format and provide them to Octopus Support if you need any assistance.
-
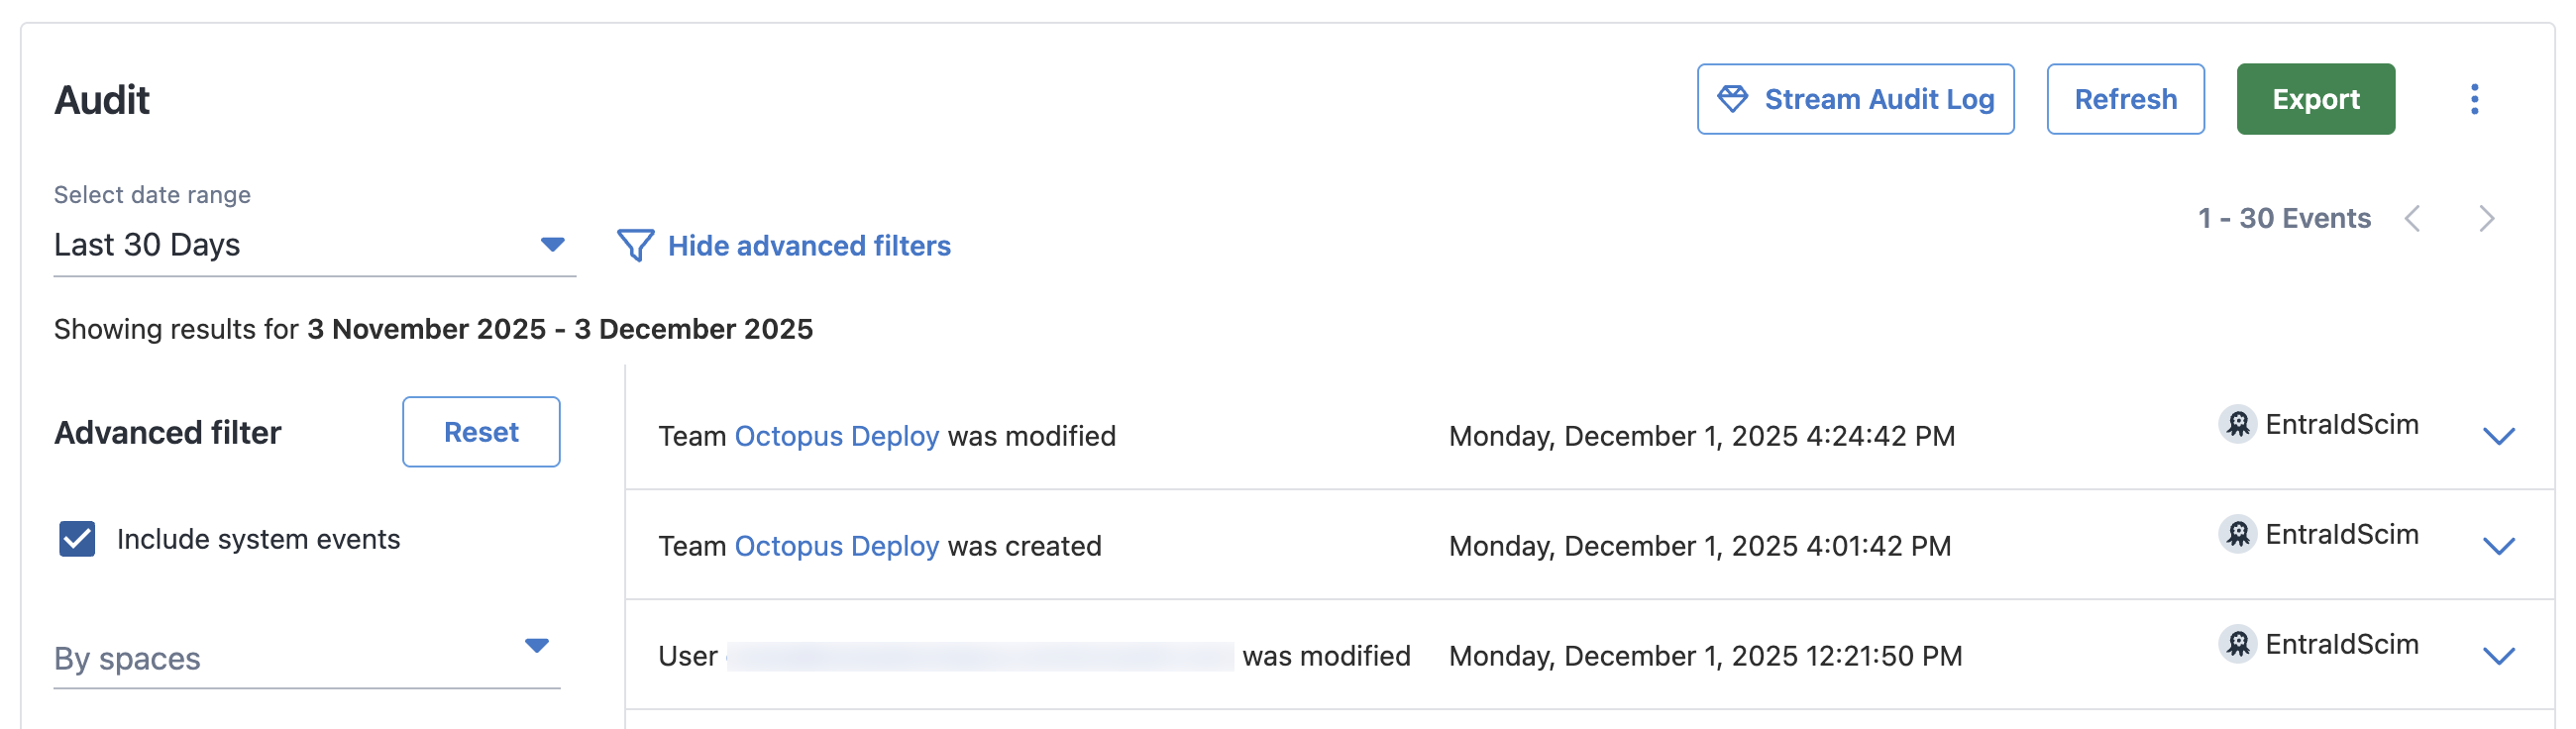
You can review the actions taken within Octopus by looking at the Audit Trail for the Entra ID service account. Navigate to Configuration ➜ Users and select the service account. Click the kebab menu in the top right, then click Audit Trail and check the box for Include system events.
Known Limitations
- Octopus Deploy does not support nested groups. Any requests from Entra ID to add a group as a member of another group will be ignored.
- Any groups provisioned by Entra ID will be global teams, rather than space-scoped teams, because Azure AD authentication applies to the whole Octopus Deploy instance. You can still apply space-scoped permissions to these teams, but the teams will be visible to all spaces.
- Octopus Deploy only supports a single email address for each user, whereas Entra ID supports many. Octopus Deploy will ignore any email addresses other than the Work email address, ie:
emails.[type eq "work"] .value